Minecraft Editors Skin Editor
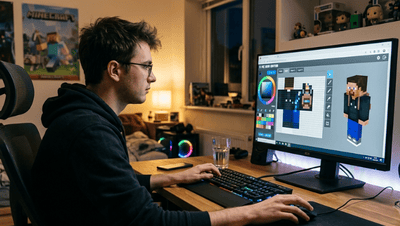
A Minecraft skin editor is a tool usually a website or app that lets you design and customize the look of your Minecraft character by editing the pixels on its texture file without needing any coding or design software experience.
If you have ever wanted your character to look like a ninja a dragon your favorite streamer or simply a better version of the default Steve or Alex model, a skin editor is the fastest way to make that happen. In this guide, we will break down exactly what these tools do how to use one properly, and what separates a good Minecraft skin editor from a mediocre one.
Whether you play on Android, iPhone, or PC custom skins work across multiple Minecraft versions. If you’re new to the game check out our Minecraft APK guide to learn more about the latest Bedrock Edition.
What Is a Minecraft Skin Editor?
Every Minecraft character is built from a single small image file, usually 64 by 64 pixels that wraps around a 3D model like a texture on a box. This image is called a skin. A Minecraft skin editor gives you a canvas to paint on that texture often while showing you a live 3D preview so you can see how your changes will actually look on your in game character.
Instead of manually editing pixel grids in a generic photo editor and guessing how they map onto arms legs and a head, a dedicated skin editor handles that mapping for you. You draw and the tool instantly wraps your art onto the correct body part.
How Does a Minecraft Skin Editor Work?
Most modern skin editors follow the same basic workflow. You either start with a blank template or import an existing skin either from a file on your device or by pulling one directly using a Minecraft username. From there you use simple drawing tools such as a pencil, fill bucket, eraser and color picker to change the design section by section.
A 3D viewport usually sits beside or above the canvas rotating your character in real time so you can check details like symmetry shading and how the front and back line up. When you are happy with the result, you export the file as a PNG image, which you can then upload to your Minecraft account or use in game depending on your platform.
After creating your skin, you can use it in Minecraft Pocket Edition by uploading the PNG file through your profile settings.
Key Features to Look For in a Minecraft Skin Editor
Not every tool offers the same level of control. Before settling on one it helps to know which features actually matter.
Live 3D and 2D preview. Switching between a flat 2D grid and a rotating 3D model helps you catch mistakes early especially around the arms and legs where perspective can be tricky.
Layer support. Layers let you separate a base skin from an overlay such as a jacket, hat or accessory so you can adjust one part without redrawing the whole thing.
Import and export options. A good editor should let you upload an existing PNG pull a skin straight from a username and download your finished work without watermarks or restrictions.
Support for both skin models. Minecraft characters come in two body types and your editor should let you switch between them cleanly.
Mobile friendly design. Since a large share of players design skins on phones or tablets touch controls and a responsive layout matter just as much as desktop functionality.
No unnecessary sign up walls. Many players simply want to create a skin and download it in minutes so tools that work instantly in the browser tend to be more useful than ones that force account creation before you can even start drawing.
Steve vs Alex: Choosing the Right Skin Model
Minecraft ships with two default character models commonly called Steve and Alex. The difference is not just cosmetic. Steve uses a classic 4 pixel wide arm while Alex uses a slimmer 3 pixel arm. If you design a skin for one model and apply it to the other the arms can look stretched or misaligned in game.
Before you start painting, decide which model your character will use. Most editors let you toggle between classic and slim right at the start and the canvas will adjust automatically so your artwork lines up correctly once it is applied in game.
Step by Step: How to Create Your Own Minecraft Skin
Here is a simple process that works across most Minecraft skin editors.
First, choose your starting point. You can begin with a blank canvas for a fully original design or import your current skin if you only want to tweak certain details like hair color or clothing.
Second, pick your model type classic or slim, so the proportions match what you plan to design.
Third work section by section. Start with the head and face since this is what other players notice first then move to the torso, arms, and legs. Zooming in while working on small details like eyes or shoe laces will save you from blurry uneven results.
Fourth use the 3D preview constantly. Rotate the model after every major change to confirm nothing looks off from the side or back since it is easy to focus only on the front view while drawing.
Fifth add an overlay layer if you want extra depth, such as a translucent cape effect glasses, or a hood without permanently altering the base layer underneath.
Finally, export your skin as a PNG file and upload it through your Minecraft account settings or launcher depending on whether you play on Java Edition, Bedrock Edition, console or mobile.
Classic vs HD Skins: 64×64 and 128×128 Explained
Standard Minecraft skins use a 64 by 64 pixel canvas, which keeps the blocky retro look the game is known for. Some newer editors also support HD skins at 128 by 128 pixels offering four times the detail for players who want sharper shading and more intricate patterns.
HD skins are not officially supported everywhere so before investing time into a high resolution design check that your platform and the server you play on will actually render the extra detail rather than scaling it back down.
Some older Minecraft releases may not fully support HD skins. If you’re playing an earlier version, see our Minecraft Old Versions guide to understand compatibility.
Tips for Designing a Skin That Stands Out
Good skins usually come down to a few small habits rather than raw artistic talent.
Keep contrast in mind. Because the canvas is small colors that are too close in shade tend to blur together once the skin is shrunk onto a 3D model.
Use shading sparingly but purposefully. A few darker pixels along edges can suggest depth without needing complex gradients.
Reference real designs. Looking at armor clothing folds or hairstyles in photos can help you translate believable shapes into a limited pixel grid.
Test your skin in actual gameplay lighting when possible since colors can look different in a bright outdoor biome compared to a dark cave.
Common Mistakes to Avoid
New skin creators often run into the same few issues. Forgetting to check the back of the model is a frequent one since many editors default to a front facing view. Ignoring the overlay layer is another which can leave a flat unfinished look compared to skins that use jackets or hats for texture.
Mixing up the classic and slim arm widths is also common leading to warped or floating arm textures once the skin is applied in game. Finally exporting at the wrong resolution such as saving a 64×64 design at 128×128 without actually adding extra detail, simply results in a blurry upscaled image rather than a true HD skin.
Is a Minecraft Skin Editor Safe and Free to Use?
Most reputable Minecraft skin editors are free browser based and do not require downloading extra software which keeps the risk fairly low compared to installing third party programs. That said, it is worth sticking to well known tools avoiding editors that ask for your Minecraft account password directly and only downloading skin files from trusted sources to avoid corrupted or mislabeled images.
Frequently Asked Questions
Conclusion
A Minecraft skin editor makes it easy to create, customize and personalize your Minecraft character without needing advanced design skills. Whether you’re editing an existing skin or designing one from scratch the right editor lets you bring your ideas to life with tools like live 3D previews, layers and simple pixel editing. Choose a tool that supports your preferred skin model export your design as a PNG, and enjoy a unique look in your Minecraft adventures.
Looking to explore more Minecraft guides? Learn about Minecraft Education Edition for classroom learning, download the latest Minecraft APK, or discover Minecraft Pocket Edition features to get even more from your Minecraft experience.