What Is The Warden And Why Is It So Dangerous
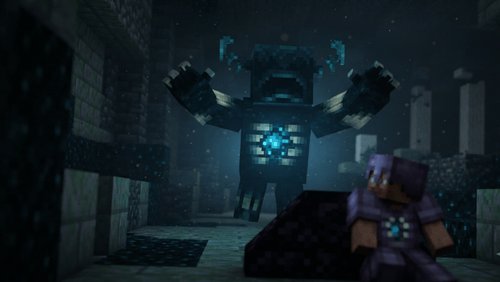
The Warden is a blind hostile mob that Mojang added during the 1.19 Wild Update and it has remained essentially unchanged through every version since including 1.20 and 1.21. It doesn’t see you at all. Instead it hunts using smell and vibration which means sneaking, standing still and controlling your noise level actually matter when you’re near one. It hits harder than almost anything else in the game capable of nearly one shotting a player even in full Netherite armor on higher difficulties and it also has a ranged sonic boom attack that ignores armor and shields completely. Mojang has been open about the fact that the Warden was never designed to be a boss you fight head on. It’s a threat you’re meant to avoid distract or outrun.
Understanding this early matters because it changes how you should approach finding one. You’re not hunting the Warden the way you’d hunt a Wither or an Ender Dragon. You’re locating its territory carefully and ideally you get to choose whether it ever notices you at all.
Both are hostile mobs and players exploring caves are likely interested in both.
Besides the Warden, zombies are among the most common hostile mobs you’ll encounter. Read our Minecraft Zombies Complete Guide for survival tips.
Step One: Head To The Deep Dark Biome
The Warden only exists in one place: the Deep Dark biome. Contrary to a common myth floating around online, the Deep Dark isn’t locked to exactly Y level 0. It actually generates across a range, roughly from Y -1 down to Y -64 with the biome showing up most commonly around Y -52. Ancient Cities specifically tend to sit between Y -40 and Y -51, with the lowest floor of the structure usually resting near Y -51. So if you’re digging with a target number in mind aim for that Y -45 to Y -55 window rather than treating Y=0 as a fixed marker.
You’ll know you’ve found it because the terrain changes dramatically. Deep Dark biomes are covered in dark blue and teal colored blocks called Sculk, along with Sculk Veins spreading across stone like a fungus Sculk Catalysts, and Sculk Sensors scattered around. The biome tends to generate beneath areas with a low erosion value, most often underneath mountainous terrain like jagged peaks, frozen peaks, stony peaks, and snowy slopes and less often beneath meadows cherry groves or badlands. It never generates beneath oceans rivers swamps or deserts so if you’re searching underwater biomes on the surface you’re wasting your time.
There are three main ways players usually get here:
Cave exploration. Dig or explore naturally generated cave systems at low elevations ideally beneath a mountain biome. This is slow but works and it’s the most authentic way to experience the discovery.
Mountain shortcuts. Since Deep Dark generation is tied to low erosion terrain searching beneath large mountain ranges genuinely increases your odds compared to digging under flat plains or deserts.
The locate command. If you’re playing in Creative mode on a server where commands are allowed or you simply don’t want to spend hours searching, typing /locate structure minecraft:ancient_city will point you straight to the nearest Ancient City which always generates inside a Deep Dark biome.
If you’re playing Survival and want the legitimate discovery experience, cave exploration under a mountain is the way to go. If you just want to see the mob for content testing or curiosity, the locate command saves enormous time.
Java Edition Versus Bedrock Edition: What Actually Differs
The core mechanics are nearly identical across both editions, but there are a few small differences worth knowing.
In Java Edition the command is /locate structure minecraft:ancient city and the game rule spawn_wardens can be toggled to disable Warden spawning entirely on your world which is useful for building or filming without interruptions.
In Bedrock Edition the equivalent command is /locate structure ancientcity, and the Deep Dark biome carries the internal numeric ID 190. Bedrock players exploring with the Vibrant Visuals graphics toggle enabled will also notice the biome renders noticeably darker with only scattered bioluminescent Sculk patches providing light which makes torches or a Recovery Compass even more valuable for navigation.
Combat feel is also slightly different between platforms due to how each edition handles hit detection and the sonic boom’s timing so players moving between Java and Bedrock servers shouldn’t assume identical reaction windows.
Step Two: Find An Ancient City For The Best Chance
While Sculk Shriekers can technically generate outside of an Ancient City your best and most reliable source of them is inside one. Ancient Cities are massive ruined structures built from Deepslate Reinforced Deepslate Sculk blocks and eerie wool and carpet decorations. They’re some of the largest generated structures in the entire game, often spanning dozens of chunks and they’re loaded with loot chests containing items like Echo Shards Disc Fragments and the Swift Sneak enchantment though most valuable loot sits in heavily trapped or guarded sections.
Ancient Cities also hold the highest concentration of Sculk Sensors and Sculk Shriekers which brings us to the actual trigger mechanic.
Step Three: Understand Sculk Sensors And Sculk Shriekers
This is the part most guides skip over and it’s honestly the most important mechanic to understand if you want control over the situation instead of panicking the moment things go wrong.
Sculk Sensors are small mushroom shaped blocks that detect vibrations things like your footsteps block breaking or item dropping. When triggered a Sensor sends a signal to any nearby Sculk Shrieker. A Sculk Shrieker is a block resembling a stone slab with a jagged mouth carved into it and when activated it lets out a visible screeching warning.
Here’s the key detail: every player has their own personal warning level starting at zero. Each time a naturally generated Shrieker activates because of you specifically your warning level increases by one. Once your warning level reaches four a Warden spawns near you within a few seconds. If you destroy the Shrieker instead of letting it finish its warning, the Warden spawns instantly.
So in practice summoning a Warden on purpose means finding a Shrieker deliberately triggering a nearby Sculk Sensor by walking running or making noise near it and repeating that process until your count reaches four. If you’re careless and don’t intend to summon one this same math explains why players sometimes get ambushed after a few unlucky steps through an Ancient City.
Your warning level isn’t permanent either. It gradually decreases if you avoid triggering anything for a stretch of time giving you breathing room if you accidentally set off a Shrieker once or twice.
How To Move Safely Once You’re Near One
If a Warden has spawned, or you’re exploring an Ancient City hoping to avoid one, a few practical tricks genuinely help.
Wool and carpet blocks muffle footstep sounds which is exactly why Ancient Cities are covered in them by design. Sneaking also reduces the noise you generate even without wool underfoot so crouching through a Deep Dark area dramatically lowers your risk. The Swift Sneak enchantment found only inside Ancient City loot chests, increases your sneaking speed without adding noise making it one of the most valuable items you can pull from the biome.
The Warden is completely blind which means it cannot see you standing still even directly in front of it. If one is actively hunting nearby but hasn’t locked onto you yet freezing in place and staying quiet is often safer than trying to run. Note that if it does spot you and gets close enough it can inflict the Darkness effect which shrinks your field of view and makes navigation even harder so keeping distance matters as much as staying quiet.
If it has spotted you and is closing in, throwing a projectile like a snowball an arrow, or even a thrown item somewhere else can distract it. The Warden will investigate the noise instead of chasing you buying valuable seconds to create distance.
Given enough time without detecting anything, a Warden will eventually dig itself back underground and despawn on its own as long as it hasn’t been named with a name tag.
Should You Fight The Warden
Technically yes, though Mojang itself has said this mob wasn’t built around combat. It has an enormous health pool far beyond a Wither’s combined with an attack strength that can strip away most of your health bar in a single hit even in top tier Netherite gear.
If you’re determined to try come prepared with maxed out enchantments Strength and Regeneration potions and keep at least fifteen to twenty blocks of distance whenever possible to reduce the risk from its sonic boom. Many experienced players prefer trapping it in a pit it can’t easily climb out of and firing arrows from a safe ledge above rather than engaging it in melee combat.
For most players though the smarter and far more rewarding goal isn’t defeating the Warden at all. It’s successfully navigating an Ancient City looting what you can and slipping away without ever triggering that fourth warning level.
Frequently Asked Questions
conclusion
To summarize the whole process simply: descend to roughly Y -45 through Y -55 beneath a mountainous biome, locate the Deep Dark by its glowing Sculk covered terrain, search for an Ancient City for the highest concentration of Shriekers, and trigger a Sculk Shrieker until your personal warning level hits four if you actually want to summon one. Move carefully, use wool and crouching to stay quiet, and remember that avoiding the Warden is often the real objective, not beating it.
The Deep Dark remains one of Minecraft’s most atmospheric additions across every version since the Wild Update, and once you understand how the Warden actually detects players, that tension turns into something you can control rather than something that controls you.